Battle Card from Postmark Games: Six Tidy and Clever WW2 Battles
Battle Card’s care in detailing, visual presentation, affordability and accessibility should endear it to non-wargamers and historical gamers looking for a fun afternoon of solo play.
This is adapted from the script of Episode 99, Battle Card Review + Meet The Lads of “War With a Mate”
When the Imperial Japanese Army hit Malaya, British Commonwealth forces — including Indian and Malayan troops — got rolled up like a taco. The Allies blew up something like 100 bridges as they fled south and the Japanese still ran them down in just over two months.
So here I sit in front of the first of six campaigns of Battle Card, a collection of WWII print-and-play titles from Postmark Games. It takes about five minutes of setup to see where the design logic and the historical situation come together on my little map, upon which sit a bunch of six-sided dice that portray the strength and position of the forces: a string of two-strength Allied units against two max-strength Japanese units.

One sheet of rules and dice that you supply get you off and running (for your life) in The Malayan Campaign, one of six WW2 “battles in a bottle” that come with Postmark Games’ Battle Card print-and-play solo game.
Looking from the Allied seat, you’re supposed to craft a successful fighting retreat — one that comes out better on your table than it did for the Brits and their cohort in real life — by rolling back down two main roads and combining strength until you find the right space to gamble on making a stand.
You want accessible? I picked up the rules in earnest for the first time last Sunday morning and logged 20 games before the day was over. Including an 11-game test because I thought I’d found an exploit where you could easily win at far north of 50%. I was wrong. I barely won the 11th-game tiebreaker.
I think it was fitting that the only colored d6s I had to use for the Japanese units were massive red novelty craps dice, because it really brought home the feeling of a massive and implacable opponent bearing down on your house of toothpicks.
You’ll soon be hauling ass down one of the two Malayan roads where the pursuing Japanese always catch up with you, forcing you into binary defend-or-counterrattack rolls.
There’s just two ways to succeed: Get one of your seven die down the road to Singapore while it’s at three strength or better, or destroy one of the two six-strength Japanese forces. None of your dice have more than two value except for one; it’s designed to be a running beatdown where you have a couple of windows to win.
The Allies have another consideration: Halfway down one of the two roads in a place called Endau. If you get booted out of there, you lose regardless. For a brief time you’ve got air cover that lets you bomb one of the IJA’s dice and reduce it by one, but I can’t envision any way you can hold it longer than a turn, so that air support has to be in the right place.
It reminds me of the fight scenes from 1974’s Chinatown. There’s no seesaw battle where one guy has some stage blood trickling from one corner of his mouth after 15 seconds of boxing. It’s a broken nose, it’s a knee to the crotch, and it’s over. Sometimes I couldn’t believe how short the games were. The Allies also forfeit if you run out of turns, but I don’t think I ever had one go past four.
On my last try of the night, I abandoned my 50/50 success rate strategy of squaring off with the Japanese at Kampar on the Trunk Road and tried the “haul ass to Singapore” gambit instead, winning narrowly on my first try.
Experienced wargamers may find this a passing novelty, but this is a quick-punchout puzzle that could serve as a great entry point for the kind of person who thought they’d never pick up a wargame.
Students of the era will appreciate touches like seeing the Australian and Indonesian outfits IDed on the map; people who just want a lighting-round puzzle will get it, because it’s over in sometimes two or three moves if you don’t. The Malayan Campaign feels like it can easily serve either kind of player.
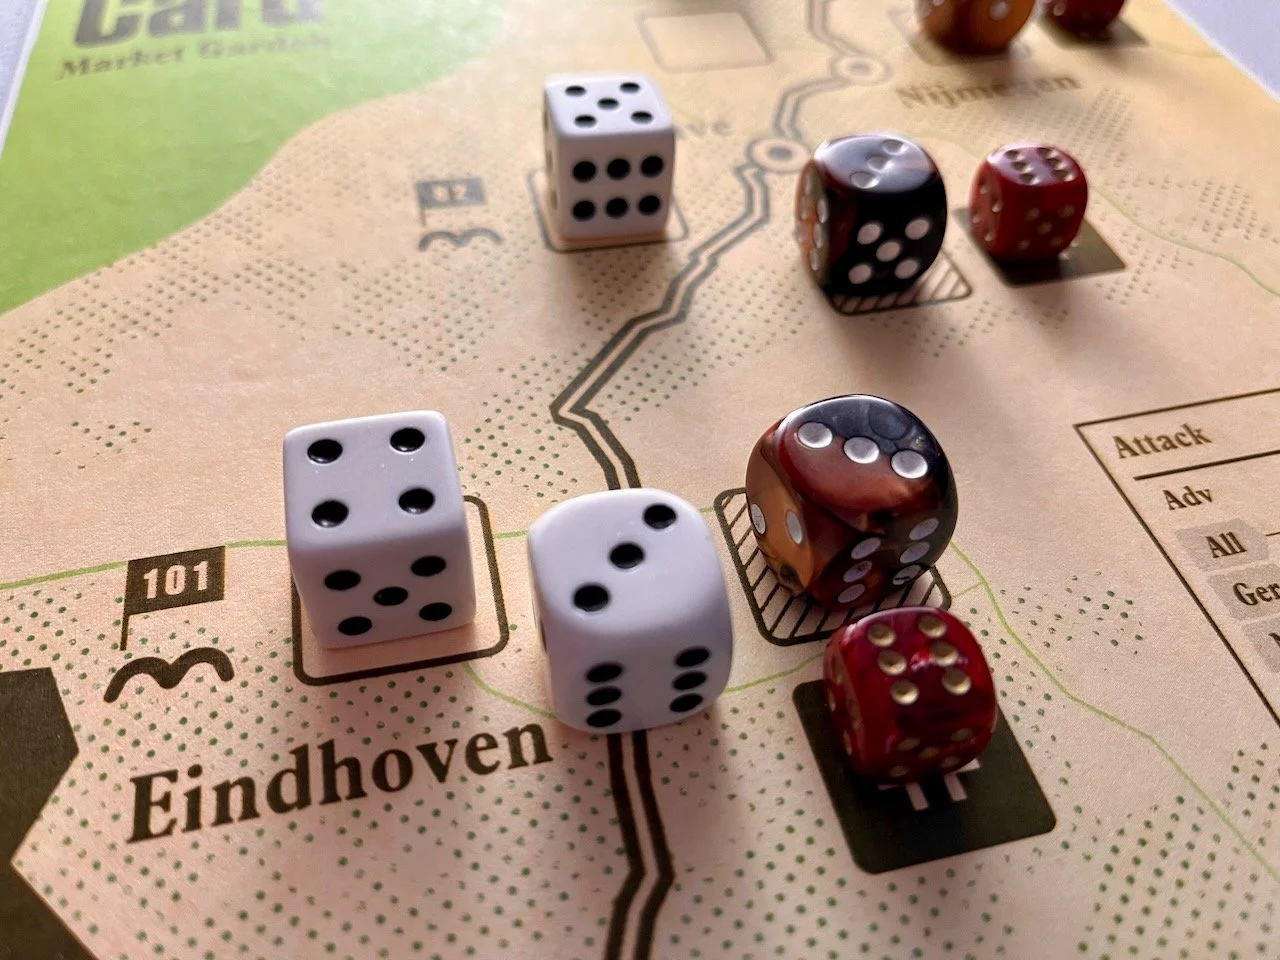
The next day I moved on to the second of the six maps: Market Garden, depicting the massive Allied airdrop into Holland that didn’t quite go well. Can I make it come out better? Yes. Unless I got a rule wrong, I had the smoothest command debut in the history of warfare. I rolled the American 30 Corps from Eindhoven to the critical bridge at Arnhem in a silky five turns.

Battle Card Market Garden scenario: Get outta the way losers, 30 Corps’ coming through
Sometimes these matches feel so slight that they evade coming into being, but these are billed as microgames after all.
This one has a variable setup, because the Allied forces at each of the four towns along the route were airdropped in, so the first step is finding out just how many men you have after the chaos of their parachute rides. These units have to get control of their drop sites so the 30 Corps can roll on through. Hold a town long enough for them to get there? The Germans get crushed when 30 Corps shows up.
But there’s a ticking clock and no room for snags. If you haven’t seized the bridge at Arnhem in six or fewer turns OR you lose any of your airborne elements in combat, it’s lights out, you’ve lost the initiative and the ability to control the route. The German dice start out weak but gradually reinforce if you don’t keep a foot on their neck.
This is spiced up by the fact that outside of the 30 Corps rolling through town, there’s pretty much zero help coming for the 101st in Einhoven, the 82nd in Grave or the 1st Airborne in Arnhem. Each have to attack enough to generate a table result that flips their assigned town to U.S. control. The 30 Corps can’t get in otherwise.
There’s one opportunity for the First Airborne over at the Arnhem bridgehead to reinforce, but other than that, none of the German garrisons you attack in any of the four towns can be totally removed by your airdropped forces. Each turn, the German die regrow a HP, reminding you to keep this thing moving at all costs.
There’s also an interesting wrinkle in the town of Nijmegen — the last stop on the road before the climactic bridge. You have no forces there. If the 30 Corps stalls on the road because the advance forces couldn’t control a town, it looks like you’ll have to waste a precious turn shifting your other airborne forces down the road to hit Nijmegen while the 30 Corps sits in their own exhaust fumes wondering what the hell the holdup is.
This didn’t happen to me my first two tries because my setup rolls and repeated attacking favored me, so I’m curious to see what happens the day my early luck runs out and I have to sweat out a time-costly move to secure Nijmegen while the clock ticks.
I’ve got four more Battle Card scenarios in the wings waiting to be tried: Operation Brevity, The Battle of Moro River, Operation Eidelweiss, and The Battle of Mortain, all of which promise to throw more curves and puzzles that are thoughtfully meshed with the inflection points of the actual battles. I’ll be adding those playthroughs on the blog throughout the fall.
Here’s my read on this series so far: This is an elegant and approachable path to a historical game that works just as well for somebody who doesn’t care about wargames but who will be lured in by the promise of a well-designed map, some dice, and a story-based spatial puzzle with some luck built in to evoke the abstracted battlefield. I could feel the trumpet of relief pierce the fog in the Dutch countryside every time I got to push my plain white die, representing 30 Corps, one town closer to the objective and remove a German die from the map. It felt more satisfying than it had a right to.
In terms of making high-value eye candy with jump-in-and-drive rulesets, Postmark Games seem like they have it totally dialed in. And speaking of design, I need to circle back and correct an omission in my Episode 98 preview: Postmark Games consists of Matthew Dunston and Rory Muldoon, who bring years of game and visual design expertise to bear on these affordable diversions. In addition, Nils Johansson gets graphic designer and co-game designer billing for the Battle Card series along with David Thompson. Strong work, gents.
Next episode the Fall Indie Game Haul continues with play notes and impressions on what’s in this little Pyrotechnics box from The Seahorse and the Hummingbird team.